JAPANESE SPONGE CAKE
This chocolate version of Japanese Sponge Cake makes an incredibly decadent and impressive dessert!
With it’s rich chocolate flavor and unique melt-in-your-mouth texture, this dreamy cake is truly reminiscent of biting into a fluffy chocolate cloud!
To really appreciate its light, airy, souffle-like, delicate softness, it’s best enjoyed warm!
Perfect for chocolate lovers, this indulgent cake is so worth the effort and without doubt, looks exceptionally stunning!
UPDATED ON 7TH JANUARY 2025.
THIS RECIPE HAS BEEN REFRESHED, WITH IMPROVED INSTRUCTIONS, TIPS & CLARIFICATIONS.
Looking for more delicious dessert recipes? Try my BEST Mango Mousse Cake, or this Easy Aish El Saraya OR this delicious Easy Chocolate Cake Recipe!

An impressive Chocolate Japanese Sponge Cake that literally feels like biting into a fluffy chocolate cloud! Let’s Make It!

What You’ll Love About This Recipe
Recipe Ingredients

Ingredient Notes
Eggs: use fridge cold, large eggs weighing 55-60g with shell, I use free range. Eggs are the main ingredient providing the primary structure of this cake. When the egg whites in this cake are whipped, they incorporate air into the batter, which is trapped air that expands during baking, giving the cake rise and the fluffy, cloud-like texture. Whipping the egg whites correctly is key to the success of this cake! I highly recommend you read below for all the tips on whipping the egg whites correctly for this cake;
Butter: unsalted butter adds richness to the cake;
Chocolate Chips: the addition of good quality chocolate chips enhances the rich chocolate flavor and contributes to the great texture of the cake!
- I use Callebaut 811 Chocolate Chips, which are Dark Callets with 54.5% Cocoa Solids, 37% Total Fat and a Medium Fluidity Level.
- The type of chocolate chips used affects the final outcome of your cake! The reason being, the percentage of cocoa butter content determines the fluidity of the chocolate.
- Chocolate with a higher cocoa butter content has higher fluidity. When the chocolate has high fluidity, it will be more liquid when melted. This will affect the amount of liquid in the cake and in turn the structure!
- To give you an example, I tried this cake with Kirkland Baking Chocolate Chips from Costco, and the cake did not turn out well, it was quite dense – the reason being the chocolate itself was thick when melted, thus not as liquid as the Callebaut 811. Ghirardelli chocolate, is also a great option. However, I’d be referring to information on the cocoa solid percentage, total fat and fluidity levels, prior to use;
Milk: the proteins and fats in milk help tenderize the cake and set the structure. It also contributes to the soft and delicate texture. Use full cream or 2%;
Coffee Powder: enhances the chocolate flavor – don’t worry you won’t be able to taste coffee in the cake! I use Moccona Instant Coffee, Nescafe is also a good option. Ofcourse you could use freshly ground coffee beans. However, I don’t use freshly brewed coffee for this cake as it is mixed with water, so it will change the amount of liquid in the recipe and affect the structure. If you do not wish to use coffee at all, just leave it out of this recipe;
Cocoa Powder: the cocoa powder you choose is important, as it’s the main flavor of this cake, I always use a good quality dutch processed, unsweetened cocoa powder, like Valrhona. Some other great options include Rodelle or D’Roste;
Cake Flour: for a truly light, soft and airy cake, use cake flour. It’s a fine, low protein flour that’s perfect for delicate and soft sponge cakes. I use the Lighthouse Brand which is readily available in Australia. I have tried Swans Down Cake Flour which is available in the US and it also yields the same results;
Baking Powder: adding baking powder contributes to the rise of the cake, I use the MacKenzie brand which is readily accessible in Australia, any good quality baking powder will do;

MUST READ RECIPE TIPS!
This cake is straightforward to make if you follow the proper techniques, use the right ingredients, and measure everything accurately. Be sure to check out the important tips and tricks for making this incredible Chocolate Japanese Sponge Cake below:
- Preheating: ensure your oven is fully preheated for even baking at 140C or 285F for at least 10 minutes prior to baking;
- Lining the Pan: to ensure easy removal and clean-up, the first step in preparation is to line your baking pan with parchment paper. While it’s not necessary to butter the pan first, you can lightly grease it to make holding the parchment paper in place, a little easier. Leave some parchment paper overhanging the sides so you can easily lift the cake out once baked.;
- Fridge Cold Eggs: chilled eggs whip up to create a firmer, more stable meringue. The meringue forms the base of this cake, helping it rise while maintaining a fluffy texture;
- Correct Measurement of Ingredients: weigh all your ingredients out accurately to ensure this cake turns out right! I highly recommend investing in a good quality kitchen scale to achieve great and consistent results!;
- Coffee Powder: a teaspoon of instant coffee powder enhances the chocolate flavor, don’t worry you won’t be able to taste the coffee in the cake!;
- Serve Immediately: Once the cake is done, you can remove it from the pan right away. You can top it while it’s still warm and serve immediately for the best experience!
- Use An Electric Beater: Whipping egg whites properly takes about 20 minutes for this cake, so to save your arm from the strain of a regular whisk, I strongly recommend using an electric hand or stand mixer with the whisk attachment;
- Cake Pan: the measurements for the batter make for a perfect cake in a 9″x 5″ loaf pan!
I prefer the USA Pan Bakeware brand for its well-defined square shape, which creates perfect edges and a cute muffin top for this cake. Other excellent brands include Fat Daddio’s and Mondo. Lighter-colored pans yield softer cakes with gentler baking, while darker pans absorb more heat, resulting in a drier cakes and crusts. I have not tried this using any other sized cake pans; - Oven: ensure you bake the cake using conventional heating, i.e. top and bottom heating, without fan. Fan heating can dry out this cake by overcooking it.

How To Whip The Egg Whites Correctly To Soft Peaks!
Whipping egg whites correctly is essential for achieving the light, airy texture and rise of this Chocolate Japanese Sponge Cake. When whipped into a meringue, it is the foundation of the cake and it’s important that it’s stable to maintain the structure. Here’s how to do it:
1. Start with Clean, Dry Equipment:
- Ensure your mixing bowl and beaters are completely clean and dry. Any oil or residue can prevent the egg whites from whipping properly.
2. Use Chilled Eggs:
- Use cold eggs straight from the fridge, as they whip better and create a stronger, more stable meringue – essential for the structure of this cake.
3. Start Slow & Incorporate Sugar Gradually:
- Begin whipping the egg whites at a low speed until they become foamy/frothy, this step ensures even air incorporation and helps to build a stable structure. Once foamy, start sprinkling in the sugar gradually. This allows enough time for the sugar to dissolve into the egg whites – while the whites get cloudy and eventually become a meringue of soft peaks. Do not dump the sugar in altogether!
4. Correct Beating Technique – Increase Speed Gradually:
- Gradually increase the speed of the electric whisk to low-medium.
- The gradual increase helps create and maintain small, even air bubbles in the meringue, which is key to achieving the cake’s fine, soufflé-like texture.
- Once the meringue is ready, look closely, and you’ll notice tiny air bubbles.
- After baking, the cake will feature tightly packed air bubbles, contributing to its signature texture.
- Avoid beating at high speed, as it can cause larger air bubbles, altering the texture.
- Continue whipping at low-medium speed until soft peaks form. Be patient, as this can take around 20 minutes.
- To speed up the process, after the 15 minute mark, briefly increase the speed to high in quick, short bursts.
- Quickly return to low-medium speed to maintain small air bubbles.
- Although it takes time, this method creates a stable meringue with a strong network of small air bubbles.
5. Avoid Over Whip Meringue:
- Ensure you stop beating once the meringue reaches soft peaks. That is, when the meringue holds its shape but folds over at the tip gently, like a soft horn, when the whisk is lifted. The meringue will have a glossy appearance. There is not much time between when the meringue goes from soft peaks to medium and stiff peaks. If you over whip, it will cause the cake to rise rapidly when baking, increasing the chances of the top cracking!

Heating Butter, Chocolate Chips, Instant Coffee & Milk
When melting these four ingredients, gently heat them in the microwave, in 20 second bursts until all the ingredients have completely melted and dissolved.
Stir between intervals to avoid overheating.
You want it to be hot, but not too hot, otherwise once poured into the egg yolks, you will end up with scrambled eggs, which is obviously not what you want!
Alternatively, for gentle heating, melt this over a double boiler.

Bake In A Water Bath (Bain-Marie)
Baking this Chocolate Japanese Sponge Cake in a water bath (also known as a bain-marie) is crucial for achieving its signature light, fluffy texture and smooth surface. This means, placing your cake pan into a larger tray, then carefully filling the larger tray with hot water until it reaches about an inch high, up the sides of the cake pan. This water bath helps to evenly distribute heat and maintain moisture while baking. Here’s why:
1. Even Heat Distribution:
- The water bath ensures the cake bakes evenly by distributing heat more gently and consistently. This prevents the edges from cooking faster than the center, which can cause the cake to rise unevenly or crack.
2. Moisture Retention:
- The steam generated from the water bath adds moisture to the oven, which helps keep the cake soft and prevents it from drying out during baking.
3. Prevents Cracking:
- The gentle, consistent heat from the water bath reduces the risk of the cake cracking on the surface, ensuring a smooth, even finish.
4. Controlled Rise:
- The water bath helps control the rate at which the cake rises, resulting in a delicate crumb structure and a light, airy texture. This is especially important for Japanese sponge cakes, which rely on a careful balance of air and structure.
5. Prevents Overbaking:
- The moist environment created by the water bath helps prevent the cake from overbaking, which could lead to a dense or rubbery texture.
In summary, baking this chocolate Japanese Sponge Cake in a water bath is key to achieving its delicate, cloud-like texture and flawless appearance.


IMPORTANT METHOD TIP
After separating the eggs, stir the yolks and set them aside to prevent a film from forming on the surface.
Whip the egg whites into a meringue before proceeding with the next steps. This ensures yolk mixture will be warm, when incorporated into the meringue which is ideal for this cake!
It’s either because your meringue has been over or under whipped. Follow my tips above on how to whip the egg whites correctly to soft peaks!
The meringue may have been over whipped and lost stability – refer to my tips above for properly whipping egg whites correctly to soft peaks. Alternatively, the cake might be underbaked. Since every oven is different, always perform a skewer test; if it comes out wet, bake for another 2-3 minutes and check again.
WATCH How To Make It
Storage & Reheating
Reheating: Reheat in the microwave in 10-15 second bursts;
Storage: If you happen to have any leftovers for next time – store this chocolate Japanese Sponge Cake in an airtight container, in the refrigerator for upto a 7 days. I like storing left overs in glass pyrex/decor storage containers. I avoid plastic storage options where possible;
Freezing: You can freeze this for upto 3 months.

I hope you enjoyed this delicious chocolate Japanese Sponge Cake recipe!
If you gave it a try, please be sure to leave a comment and rating! I’d love to hear your thoughts! Happy Cooking!

Japanese Sponge Cake
Ingredients
- 6 large egg whites
- 110 g caster sugar
- 80 g butter unsalted
- 30 g chocolate chips I use callebaut 811
- 1 tsp instant coffee powder I use Moccona
- 100 mL milk
- 6 large egg yolks
- 90 g cake flour I use the Lighthouse brand
- 10 g cocoa powder I use Valrhona
- ½ tsp baking powder
Instructions
- Preheat oven to 140℃ or 285℉ for at least 10 minutes prior to baking.
- Line a loaf pan with parchment paper, making sure to cover both the base and sides. Greasing the pan with butter before adding the parchment paper is optional, and can help keep the paper in place. Leave some parchment paper overhanging the sides so you can easily lift the cake out once baked.
- Separate eggs into two large bowls. Stir the egg yolks to prevent a film from forming on the surface, set aside.
- Whisking Egg Whites into Meringue: Using an electric beater with the whisk attachment, whisk egg whites on low speed, gradually building up to low-medium speed. Once foamy, gradually add in sugar in batches until fully incorporated.
- Meringue of Soft Peaks: Beat egg whites till it forms a meringue of soft peaks, this can take around 20 minutes. (i.e. when the whipped egg whites hold their shape but fall over at the tip gently, like a soft horn, when the whisk is lifted.) Set aside.
- Microwave Heating: In a large mug, heat butter, chocolate chips, instant coffee powder and milk in the microwave in 20-second bursts, stirring between intervals until everything is fully melted and dissolved. It should be hot, but not too hot—avoid overheating.
- Incorporate Heated Liquid into Yolks: Slowly pour in the warm/hot melted mixture into the yolks, in a slow, steady stream, while whisking continuously until just combined.
- Add Dry Ingredients: To the yolk mixture, sift in cake flour, cocoa powder, baking powder and whisk until just combined, it should be silky.
- Incorporate Meringue: Gently fold in a third of the meringue into the warm yolk mixture to lighten it. Then, pour the lightened batter into the remaining meringue and fold carefully until no white streaks remain. Be sure not to overmix to avoid deflating the meringue.
- Pour batter into prepared loaf pan.
- Water Bath (Bain-Marie): Place bake loaf pan into a larger oven-proof pan, and fill the pan with hot water about an inch high to create a water bath.
- Bake at 140℃ or 285℉, top & bottom heating (conventional, i.e. without fan) for 1 hour.
- Check: Insert a toothpick to check for doneness, it should come out clean. If wet, bake another 2-3 minutes.
- Removing Cake: Remove cake from the oven and lift it out of the loaf pan using the overhanging parchment paper. There's no need to cool the cake.
- Serving Ideas: Serve the cake warm on its own or add a topping of chocolate sauce, fresh cream, and/or fruit. For a simpler option, dust with icing sugar or cocoa powder.
Notes
Grab your Free copy
Low on Dinner Inspo? Let’s Fix That!
Sign Up Now and receive my Top 5 Easy Dinners eBook,with recipes ready in 30 minutes or less – absolutely FREE!
PLUS – Never Miss a Post!
Be the first to access fresh recipes and updates from Razia Cooks!


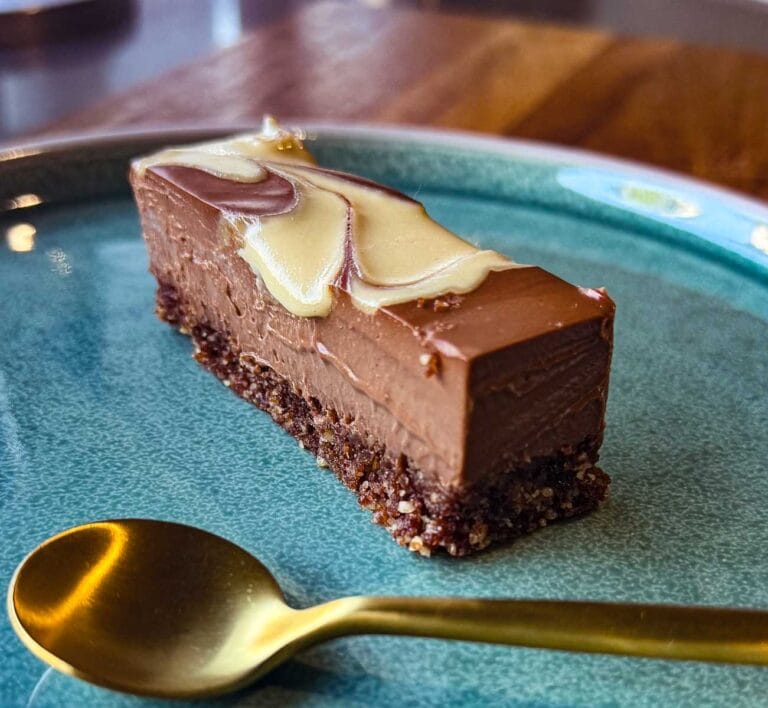


How do you make the chocolate sauce that you put on top?
Hi Carissa! Thanks for asking! I melted some good-quality chocolate (Callebaut 811 Dark Chocolate Callets) with a bit of vegetable oil in the microwave. Coconut oil works wonderfully too and is now my favorite for a smooth, glossy chocolate sauce. I didn’t measure exact amounts—just enough to pour over the cake. I hope this helps!”
What an incredible recipe! I tried it and tastes its soooooo good! I’m so glad I came across this recipe, the tips were really helpful!
Thank you so much! I’m so glad you enjoyed this recipe!